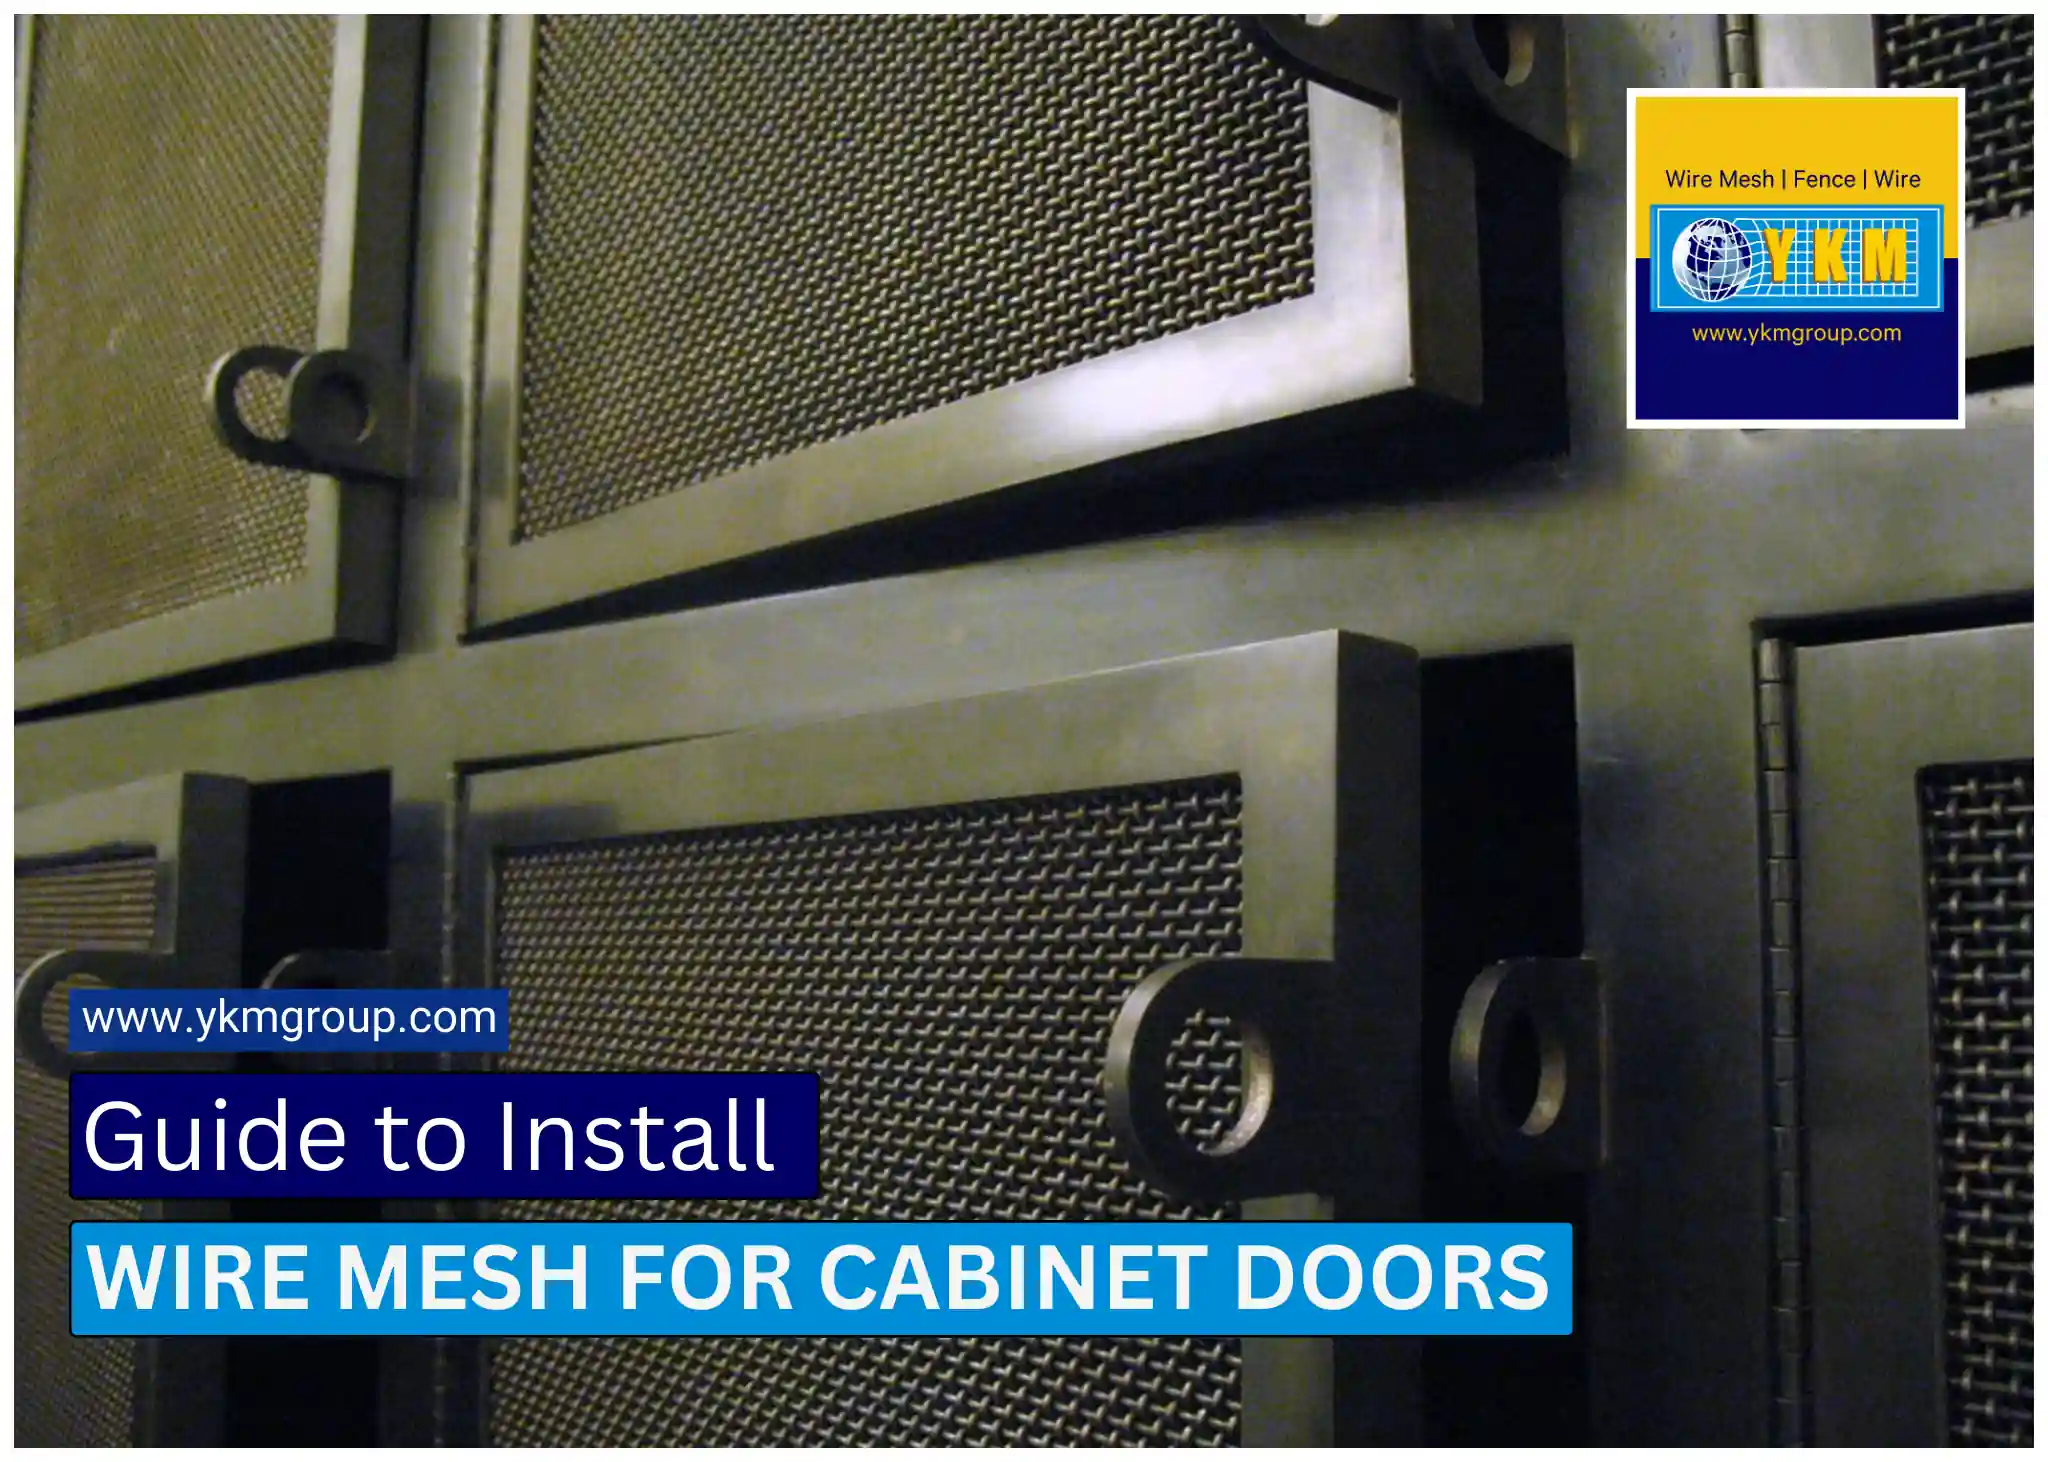
Cabinet doors are an essential part of kitchen and storage units, adding both functionality and aesthetic appeal to your space. While traditional solid doors are common, wire mesh doors offer a unique and stylish alternative. In this step-by-step guide, we will walk you through process of how to install Wire Mesh for Cabinet Doors, ensuring a seamless and professional finish.
Wire mesh cabinet doors have gained popularity for their ability to add a touch of rustic charm to any space while allowing for ventilation and visibility of stored items. Whether you’re upgrading existing cabinets or customizing new ones, this DIY project is manageable with the right tools and techniques.
Types of Wire Mesh for Cabinet
Woven Wire Mesh:

Woven wire mesh is made by weaving individual wires together to create a strong and durable material. It comes in various weaves, patterns and mesh sizes, allowing for customization to suit your specific needs. Woven wire mesh is often used for cabinet doors in kitchens, bathrooms, and other areas where ventilation and visibility are important.
The most common woven wire mesh used are epoxy coated mesh, copper mesh and the stainless steel mesh.
Expanded Metal Mesh:

Expanded metal mesh is created by cutting and stretching a single sheet of metal, resulting in a mesh-like pattern with diamond-shaped openings. This type of mesh is known for its strength and rigidity, making it ideal for applications where security is a concern. Expanded metal mesh is commonly used for cabinet doors in industrial settings and outdoor cabinets.
Perforated Metal Mesh:
Perforated metal mesh is similar to expanded metal mesh but features evenly spaced holes instead of a mesh pattern. This type of mesh offers excellent airflow and visibility while still providing some level of security. Perforated metal mesh is often used for cabinet doors in retail stores, display cases, and storage cabinets.
Wire Grid Mesh:

Welded Grid mesh consists of welded wire panels arranged in a grid pattern. It offers a clean and modern look, making it popular for contemporary cabinet designs. Wire grid mesh is lightweight yet durable, making it easy to install and maintain.
Decorative Wire Mesh:

Decorative wire mesh is designed to add visual interest and style to cabinets. It comes in a variety of patterns and finishes, allowing you to customize the look of your cabinets to match your decor. Decorative wire mesh is often used for accent panels and decorative inserts in cabinet doors.
Tools and Materials Needed
Before you begin, gather the following tools and materials to Install Wire Mesh for Cabinet Doors:
- Wire mesh
- Cabinet doors
- Measuring tape
- Wire cutters
- Staple gun or adhesive
- Sandpaper
- Paint or stain
Step by Step guide to Install Wire Mesh for Cabinet Doors
Step 1: Measure Your Cabinet Doors
Before you start to install wire mesh for cabinet doors, start by measuring the dimensions of your cabinet doors accurately. This will ensure that the wire mesh panels fit snugly into place. Use a measuring tape to measure both the width and height of each door.
Step 2: Cut the Wire Mesh Panels
Using wire cutters, carefully cut the wire mesh panels to match the measurements of your cabinet doors before you install wire mesh for cabinet doors. Make sure to wear safety goggles and gloves during this step to protect yourself from any sharp edges.
Step 3: Attach the Wire Mesh Panels
Once the wire mesh panels are cut to size, use a staple gun to attach them to the back of the cabinet doors. Start by stapling along the edges of the panels, ensuring that they are secured firmly in place. Work your way around the entire perimeter of each door, spacing the staples evenly.
Step 4: Secure the Wire Mesh Panels
To ensure the wire mesh panels are securely attached, reinforce them with screws. Pre-drill holes along the edges of the panels and then use a drill and screwdriver to insert screws into place to install wire mesh for cabinet doors. This will prevent the panels from coming loose over time.
Step 5: Finishing Touches
Once the wire mesh panels are securely in place, inspect the doors for any loose staples or screws. Tighten any loose fasteners as needed, and double-check that the panels are flush against the doors. Finally, wipe down the doors with a damp cloth to remove any dust or debris.
Conclusion
Installing wire mesh for cabinet doors is a rewarding DIY project that can instantly elevate the look and functionality of your space. With careful preparation and attention to detail, you can achieve professional results that enhance the overall aesthetic appeal of your cabinets.